Category: OUDF 203 Negotiated studies


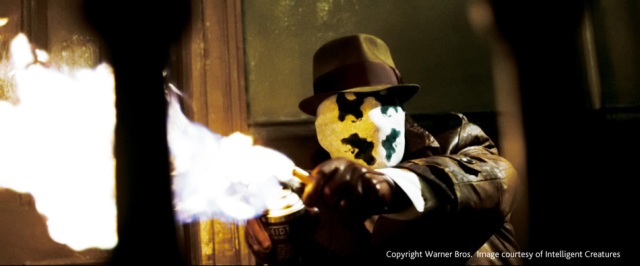
I was looking at who uses PFTrack in the industry and found that it was used in the movie the Watchmen by the VFX house Intelligent Creatures, they also used Houdini and Maya.

In particular they used PFTrack for the face of the character Rorschach.

The VFX supervisor, Jeff Newton said;

“This required a lot of very exact head tracking as Rorschach is a major character in the movie and had a lot of close ups”

They had over 300 mask shots for the character and used PFTrack for them all. They used the software to solve the camera for all of the shots and like i have been finding with motion blur,some moving shots needed manually tracking as the tracking markers on the face would blur. But with close up shots they were able to use automatic tracking.

Reading about another shot they did it seems that tracking software doesn’t like zoom shots and they would fail at the track but PFTrack is said to be ‘famously good’ at them. It seems this is down to the lens distortion correction facility in PFTtack.

“With the help of PFTrack’s lens distortion correction facility we were able to engineer our own lens distortion correction and redistortion solution. We then imported the lens distortion corrected footage into PFTrack and with the help of its Automatic and User Feature Tracking it solved the camera move and zoom animation easily”

Jeff Newton

I defiantly need to have a look at this software in the future. I remember watching this movie when it came out and wondering how do they do that?!  I’m slowly learning how.

Time willing I would have liked to have a go with PFTrack and from what I can see they dont have a student version, or i just cant find it! If i had a spare £2000 buy it but no such luck.

So I thought I would read up on it instead.

Braught to us by Pixel Farm, a company that manufactures and markets image processing technology for the professional film, TV and Broadcasting market.

PFTrack is Tracking software and after reading the overview on their website, it sounds like an impresive piece of kit. They describe it as the most comprehensive 3D tracking, match moving and scene preparation toolset thats available. So what can you do with it?

Node-based Flowgraph Architecture

‘The Tracking Tree controls the flow of data as nodes are connected to perform all of the various tasks in PFTrack 2012 such as image processing, feature and geometry-based tracking, camera solving, image modelling and file export. Nodes may be infinitely branched allowing multiple techniques to be used to achieve the most accurate result.’

Geometry Tracking

‘Geometry Tracking can be used to track either the camera or a moving object, using a triangular mesh instead of tracking points, which avoids many of the typical pitfalls that plague conventional tracking such as glints, highlights and motion blur. In PFTrack 2012, Geometry Tracking has been enhanced so that it may be used to track a deformable object like a talking face. This can be achieved by creating one or more deformable tracking groups, assigning some of the triangles in the mesh to those groups, and specifying how the groups can transform relative to the rest of the mesh.’

Image Modelling

‘Image Modelling can be used to construct 3D polygonal models that match elements viewed by a tracked camera. A set of modelling primitives are provided that can be positioned in 3D space and edited to match the image data, or new models can be constructed by connecting 3D vertex positions to form a polygon mesh. Z-Depth can be used to estimate the distance of every pixel in an image from the camera frame, producing a grey-scale depth map image encoding z-depth, and a triangular mesh in 3D space. Texture UV maps can be created and edited for any object, and both static and animated textures can be mapped onto geometry for export.’

Stereoscopic Tracking

‘When tracking a stereoscopic camera in PFTrack 2012, auto and user features are tracked simultaneously on both the left and right eye images. When solving the camera, artists have full access to the data defining the rig including interocular distance, convergence, etc.’

Image Processing

‘Already benefiting from the Enhance, Shutter Fix and rotoscoping capabilities of PFMatchit, PFTrack 2012 adds a new Optical Flow tools to calculate dense optical flow fields describing the apparent motion of objects relative in the camera plane. It will also retime clip and motion data to increase or decrease the apparent frame-rate of the camera.’

Mocap Solver

‘The Mocap Solver node can be used to calibrate the motion of individual tracking points viewed from two or more camera positions. This is often used to track the motion of an actor’s body or face, where tracking points have been identified using physical markers. In contrast to standard object tracking, the Mocap Solver node does not assume that the object is moving in a rigid fashion. The motion if each tracking point is completely independent and can therefore represent movement of non-rigid objects.’

Reading through the features of PFTrack i realise how little i have touched the surface of tracking software. A lot of this has gone over my head but it is a program i would like to experiment with and look more into depth into match moving and motion tracking.
Since the hiccup with the Faceware plugin not being compatible with Mac, i have been checking other software compatabilitles before hand. So PFTrack is compatible with Mac and Windows.

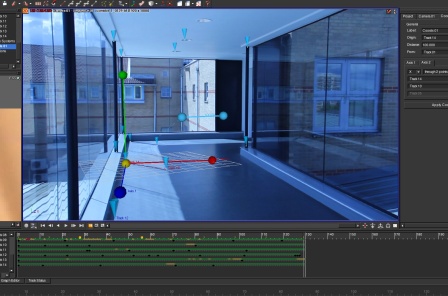
After the Millennium disaster Annebeth took me through what I needed to do to get better footage from a DSLR for what I wanted to do with it. We used a bigger space again, but used a faster shutter speed and wider aperture to eliminate the blurriness I got in the previous test.

Well this worked much better, I got a much better track of which I did manually, Annabeth also showed us that we can place the grid manually in Matchmover if the camera solve is off.

I’m lucky I exported the camera when i did because when I tried to reopen the Matchmover file it had corrupted! Lesson learnt MAKE MORE BACK UPS! Especially as Match mover has a habit of crashing on you mid camera solve and any other time it feels like it.

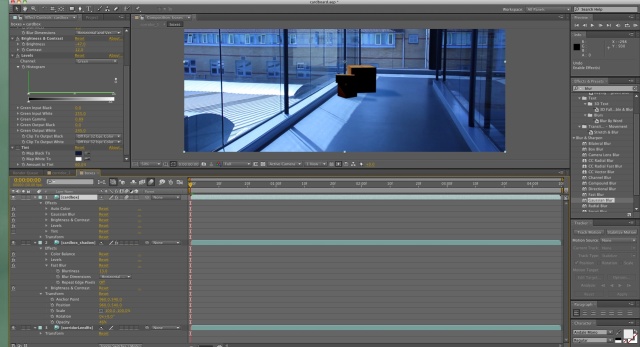
I totally forgot that the camera was still set to tungsten but I just colour corrected it again. But Mat showed me the tint effect in Aftereffects that sort of matched the boxes in the seen quite nicely. But i prefer the colour corrected one.

I’m happy i did a bigger track involving surroundings and not just some dots on paper. Maybe I shouldn’t have made such a massive leap from the dots on the paper to a very large open space and thought about an inbetween track like this one. but thats me aiming high…again.

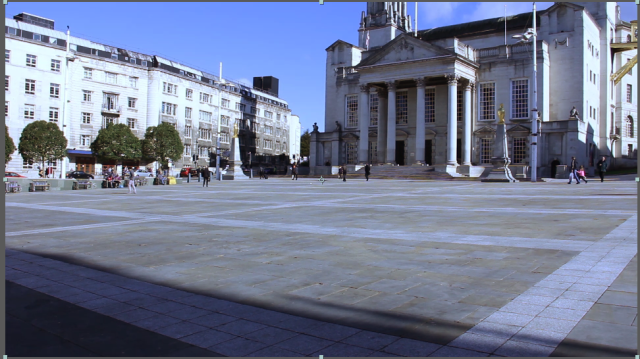
The millennium square shoot wasn’t great unfortunately but it was a test after all.

1. The lighting was set to tungsten on Andy’s DSLR so when we got back and took a look at the footage it was blue. but that wasn’t a major issue as its about tracking not visual effects. So I did a rough color correction for when I composite my cube in.

2. The shutter speed was too low that a lot of frames were blurred making it harder to track. So it needs a high aperture and shutter speed to eliminate motion blur. The only problem with this is the footage can look CG but you can add a bit of blur in post to take that perfect edge off it.

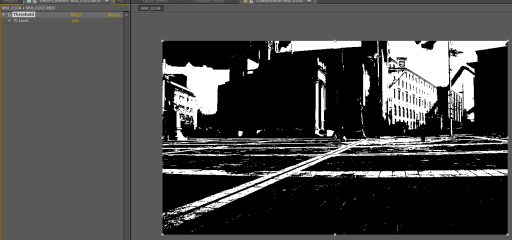
3. Although the buildings tracked alright, the floor barely tracked, with no tracks above 100 frames. I tried to resolve this by using the threshold effect in AfterEffects.

Although the lines on the floor stood out really well using threshold the footage was very noisy. Taking it into Matchmover and trying to manually track the floor with the corrected footage was possible but it wasn’t accurate enough. The pixels within the bounding box weren’t consistent, instead of a nice neat lines the while and black pixels would change to white as the camera panned round. I think this is why I got a very bad track, Matchmover was doing it’s job I just hadn’t provided it with good enough footage. Because of the changing pixels it thought the camera was moving and tracking it, when it wasn’t. I highlighted what i mean in the clip below, you can see the color of the pixels changing on and area i tried to track.

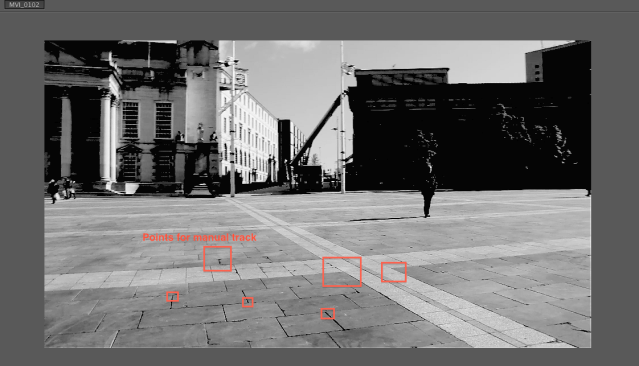
I also tried turning the image to black and white, sharpened it and upped the brightness. But because of the blurred frames it wasn’t possible to maintain a solid track. I tried manually tracking the cracks in the pavement and the corners where the different colored tiles meet.

4. Because I was having trouble with the camera solve Annabeth said to take out any lens distortion and see if that helps. Turns out there was quite a degree of lens distortion, so using AfterEffects we tried to correct that using Optics Compensation under Distortion Effect.

So here is my first export…

It’s pretty bad, with the skills I have learn over the last few weeks I just couldn’t get a better track. I do think that threshold is to blame for the shakiness but i couldn’t get a track on the floor without it. I think it also didn’t help that the tracks on the buildings in the background were so far away, confusing the camera solve.

I tried making the cube float but that was only slightly better, the shadow made it very obvious that it moves in the scene.

So i took the shadow out…

Still bad but this test was not a total loss! I have learned so much to be prepared for the next shoot. I thought that there would be enough to track but next time I’ll be sure to put some markers down. I think I was worried about masking them out but I could have just hidden them under the cube that I wanted to composite in. oh well next time I know what to do!


I have used my model from a previous module to attach the data to that i have recorded from Ben in the mocap suit. But before hand i need a bound rigg applied to my model. But i needed it to be as close to the skeleton exported by the gypsy software. It is a very basic skeleton head, shoulders, arm, forearm etc, but no digits like fingers and toes, but most importantly these joints are labled correctly to what they are. Once thats bound to my character i exported the scene (the bound model and skeleton  ) as an FBX to later import to motionbuilder to attatch my rigg.

I have been trying to follow an online tutorial and i am finding it all a bit overwhelming. I can import my mocap performance BVH file fine, it dances around fine. But in the tutorial it said I need to tell the computer what parts are what, where the elbow is for example. But I couldn’t find this list of data, the tutors was in a drop down called optics but i have no such drop down. I tried looking in other files but no such luck, so far. For now i just skipped that part and had a look at what was needed next. A puppet, I tried to get my head around it, but i am really struggling. I scaled the puppet fine , but you need to tell it which limp is influenced by which. I tried it and it was a horrible distorted mess. I need to tell the program which joints are which before i can attach the puppet.

Mat had a look at it with me but no cigar. I think it is time to call it a day on mocap for this module, i need to research into it a lot more before i think about attaching the data to a character.

I have looked at a few books in this module and bought a couple too.

I bought ‘The Art and technique of Matchmoving, solutions for the VFX Artist’ by Erica Hornung. I have found this book really good, written by a woman who is in the industry and it’s nice to read a book about how it is actually done in the industry. One thing that helped me from this book was the best way to prep my footage with colour correction and sharpening etc. It helped me understand what a job in matchmoving would in-tail. I haven’t read it cover to cover yet, but i’ll get there.

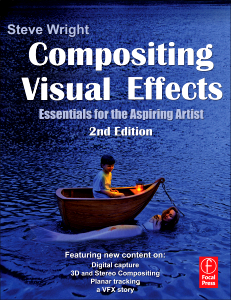
I bought ‘Compositing Visual Effects, Essentials for the Aspiring Artist, second Edition’ by Steve Wright. After the VFX module I had an interest in to what programs like AfterEffects can do. Also it has a chapter on match moving so it was relevant to my negotiated studies. This book has a massive range of different visual effects that you can do, tips on lighting, shooting a clean back plate and loads more! There are things in there that i don’t understand yet! but i’ll get there and its good to know what effects can be achieved so that i can plan projects more efficiently knowing what I need to do before hand.

For the motion capture side of my brief I got out some books from the library.

Understanding Motion Capture for Computer Animation by Alberto Menache

Human Motion Based on Actor Physique Using Motion Capture by Jong Sze Joon

MoCap for Artists by Midori Kitagawa – Brian Windsor

I haven’t really read though these in depth but I have been flicking through them and gain a brief understanding of clean up.

I came across Mocha while looking up tracking software. I had a look at this tutorial to see what it was about.

http://tv.adobe.com/watch/after-effects-cs5-feature-tour/new-features-in-mocha/

It focuses on planar tracking and could open up a lot more options for VFX compositing. In this tutorial they track out the fore ground from one sequence and place it in another. This would be so good for adding buildings to a back ground or hills and mountains.

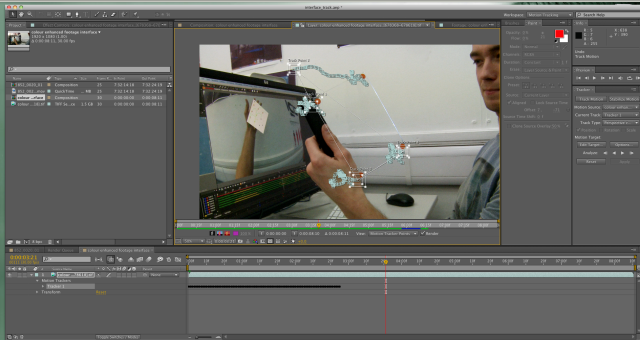
So when I had trouble tracking my interface idea in AfterEffect I thought I would try planar tracking it in Mocha.

Well… I literally opened and closed it. Someone showed me how to put in a bounding box but after that i was just lost. I felt a this late stage in the module i didn’t have time to get wrapped up in another program as i still have Motion capture to cover and some performance capture. But hopefully if there is time I will follow a tutorial for it and have a go. If not there is plenty of time over the summer.

I like to watch films and tutorial while i’m working to give me inspiration and tips.

I watched this tutorial on tracking.

http://www.videocopilot.net/basic/tutorials/05.Motiontracking/

It gave me a heads up on the understanding on Motion tracking.

In my interim crit Mat mentioned AfterEffects Mocha, so i looked up some information to give me an insight into the software.

http://tv.adobe.com/watch/after-effects-cs5-feature-tour/new-features-in-mocha/

Andy’s shoot

Saturday 19th I helped Andy with a shoot based on the final shot from the video Eye of the storm.

http://vonlitch.wordpress.com/category/oudf203-negotiated-study/

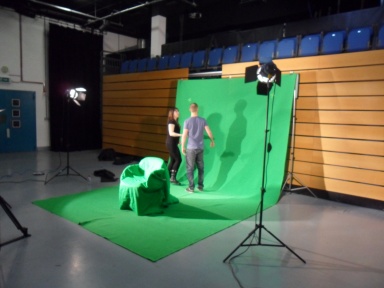
I was a bit concerned about the color of the tracking points as we were using green tape on a green screen. From what i had been learning about tracking you need high contrasting points and green on green wasn’t high contrast. But Andy was confident it would be fine and it was. Putting the footage into AfterEffects and applying the Effect Threshold to prep the footage for tracking and the tracking points stood out brilliantly. I’m not 100% sure how threshold works, I have a feeling it is something to do with light and luminosity, but I can’t find a clear definition of how it works to gain a better understanding.

We put up the set and had to make shift a dolly as the proper one was on loan.

We got some really nice footage and while we had the set up and the studio all day we did some extras shots to play with on our own time. So we had maximum greenscreen coverage we clipped the greens screen to the chairs.

As this is for Andy’s project I wont be using this footage for part of my negotiated studies but we have been putting our heads together to try and come up with the best way of getting the effect.

Looking at types of tracks I could do, I wanted to try and see how I could achieved this effect they did in Avatar. These interactive panels are transparent and has an interface composited onto the plain.

I recently bought a reading panel that has a hard plastic transparent sheet, this was perfect to use as a prop for my interface test.

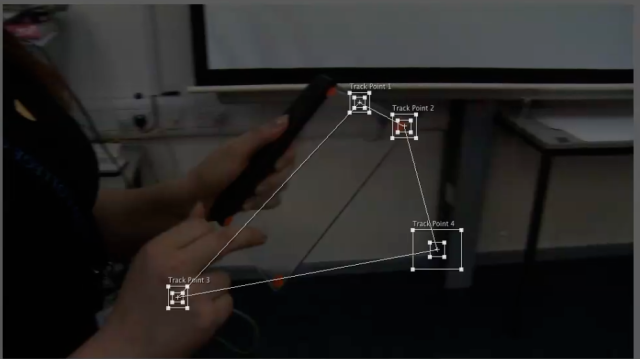
I took two sets of footage and tried to do a perspective corner pin track straight away. Both sets of footage had problems tracking. With the shot of Andy holding the prop it had trouble tracking when the colors around the tracking dots changed and it would loose the track.

With this shot, as I pretended to interact with the plane to add interactions later. The problem with this was my hand would obscure the tracking points and then lose the track.

After leaving it for a few days while getting on with other tracking in MatchMover, i wondered if, like Matchmover, I could re-position the track when it gets lost, so I gave it ago. While it was tracking forward i would stop it when it was going of track and re-position the bounding box over the tracking point. For one tracking point I had to re-position frame by frame when my hand would cover the dot and do it by eye until the dot was visible again and would pick up the track. It worked! I guess this is a lesson to prevail and problem solve using experience gained from other programs.

I made a new solid and did a very basic animation on the layer. I wanted to make sure i applied a moving image to the source of a tracked plane as i hand done it yet. This was very simple, i just had to make sure the animation was on the right section of the time line. Added a little blur for the illusion of emitting light and a back light of added effect.

So i did it! I worked out a way of creating a similar effect to that of the Avatar picture using knowledge I gained in this module!

It looks good, its very basic but it’s done the job and would be able to do it again!